How to Change Ink in HP Printers
How to Change Ink in HP Printers
Changing ink cartridges in your HP printer is a necessary maintenance task for optimal print quality. This guide covers how to change ink cartridges across different HP printer models.
Understanding how to handle your printer’s ink replacement is essential for smooth printing operations. While different models may vary slightly, our comprehensive guide covers the majority. For specific instructions on your HP model, we’ve got a section dedicated just for that. So, let’s get started on making your printing experience a breeze.
Why You Should Regularly Change Ink in HP Printers
Replacing empty ink cartridges prevents printing problems like faded text, missing colours, smudges, and ink smears. We recommend changing cartridges when ink levels run low to avoid print head damage.
Using original HP cartridges or suitable alternatives maintains excellent print results. Change cartridges regularly to keep your HP printer working flawlessly.
Step-by-Step Instructions: Change Ink Cartridges in an HP Printer
Here’s a step-by-step guide on how to change the ink cartridges in your HP printer:
Step 1: Power on Your Printer Before replacing the ink, turn on the printer to automatically identify an open cartridge door and stop all movable parts.
Step 2: Lift the Ink Cartridge Access Door Find the display’s lid and access door for the ink cartridges. After the printer has stopped moving, raise the access panel for the ink cartridges.
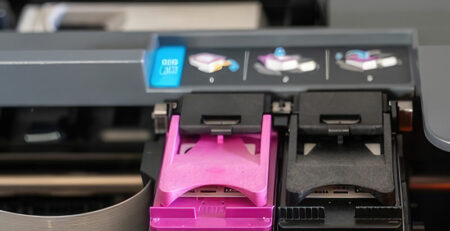
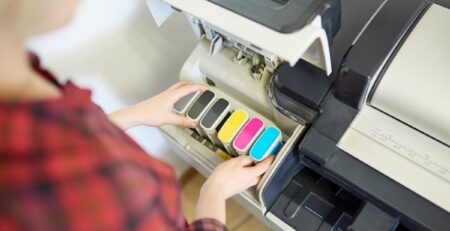
Step 3: Remove the Old Ink Cartridge(s) Lift the plastic cover keeping the old ink cartridge(s) in place, and then carefully remove the cartridge from the slot. If you’re changing the coloured and black ink cartridges, remove both of them. To prevent staining yourself, avoid touching the ink nozzles. Additionally, note that dots on the cartridge show the ink’s colour. Therefore, a black dot indicates that the ink inside the cartridge is black.
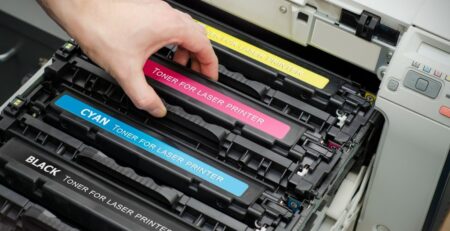
Step 4: To install the new ink cartridge(s), hold the new cartridge(s) by its sides and remove the orange sticker. Avoid touching the copper contacts underneath. Insert the cartridge(s) in their appropriate slots. Ensure the ink nozzle faces the back of the printer, and gently snap the cartridge(s) into place. If you need to, you can lift the coloured lid to insert the cartridge, but close it again when you finish.
Step 5: Close the Ink Cartridge Access Door Close the access door as in the first step. The process should be smooth and slow to avoid breaking the cover or even displacing the printer’s components.
Step 6: Confirm the Ink Cartridge Replacement Click on the “OK” button from the printer’s control panel. That will prompt the printer to automatically detect the replaced ink cartridges. Therefore, the prompt is meant to help you confirm the changes.
After confirming the change of ink cartridge, the printer will automatically print an alignment page to complete the process. You need to load some papers if your printer has none.
Remember, different models might have slight variations in the process, but these general steps should help you replace ink cartridges in most HP printers.
Tips for Changing Ink in Specific HP Printer Models
HP printers come in various models, and we understand that each one may have a slightly different ink cartridge replacement process. No worries! In this section, we’ve compiled specific instructions for popular HP printer models:
- HP LaserJet – Pull toner cartridges straight out instead of up.
- HP DeskJet – Open the scanner lid to access the cartridge bay.
- HP OfficeJet Pro – Cartridges are side-by-side rather than stacked.
- HP ENVY – Uses 5-6 cartridges so replace all together.
Troubleshooting Ink Cartridge Issues in HP Printers
Sometimes, even with the right steps, you may encounter a hiccup during the ink-changing process. Don’t worry; it happens to the best of us! In this section, we’ll cover the most common issues you might face and provide easy-to-follow solutions. Whether your printer isn’t printing when the ink is full or you face challenges after changing cartridges, we’ve got you covered. Keep your printer in excellent condition with these troubleshooting tips.
If print problems continue after installing new cartridges, try these troubleshooting tips:
- Remove any sticker/tape remnants from new cartridges.
- Reseat cartridges to ensure proper connections.
- Clean clogged cartridge nozzles.
- Reset the HP printer to detect new cartridges.
- Confirm correct cartridges were used.
Conclusion: Empowering You for High-Quality Printing
You’re now equipped with the knowledge to change ink cartridges in your HP printer like a pro. Regularly checking ink levels and knowing when to replace the cartridge ensures uninterrupted printing with exceptional results.
Summary of steps for HP ink cartridge replacement:
- Change cartridges regularly to maintain print quality.
- Power on the printer and open the cartridge access door.
- Remove old cartridges; unpack and insert new ones.
- Close the door once all cartridges are replaced.
- Confirm installation on printer display.
- Troubleshoot issues like clogs or connection problems.