How to Change Ink in Epson Printers
Guide to Changing Ink in Epson Printers
Changing the ink cartridges in your Epson printer is a straightforward process that ensures you continue to produce quality printouts. While the steps vary slightly across Epson printer models, the overall process is quite similar. This guide will walk you through the basics of changing cartridges in your Epson printer.
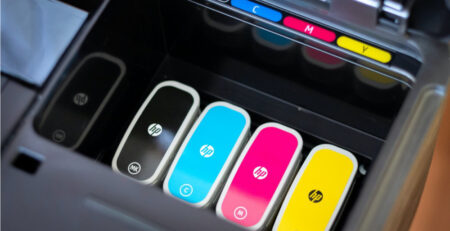
Arrange New Cartridges in Order
When you purchase replacement Epson ink cartridges, you’ll receive a set of four cartridges – three colour cartridges (cyan, magenta, and yellow) and one black cartridge.
Before installing them in your printer, take a moment to arrange the new cartridges in the correct order.
Lay the cartridges out on a piece of paper with the labels facing up. Place them in the installation order, which is: Cyan, Magenta, Yellow, Black.
Arranging the new cartridges in order ahead of time ensures you install them correctly later on.
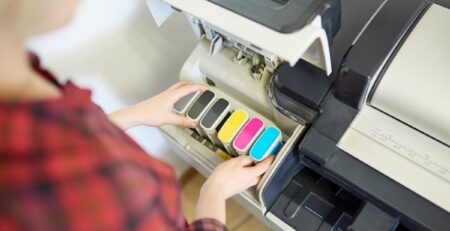
Remove the Old Cartridges
With the new cartridges arranged in order, you’re ready to remove the old ones from your printer. First, make sure your Epson printer is powered on. Lift the lid of the printer to expose the cartridge carriage inside.
Gently pull back the cartridge cover to reveal the existing ink cartridges. Now remove each cartridge one-by-one by squeezing the tab on the end and lifting upward until the cartridge releases. Remove all cartridges, disposing of the empty ones responsibly. Many local electronics stores offer cartridge recycling.
With the old cartridges removed, the carriage is ready for the new ones.
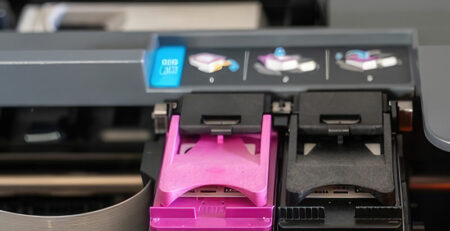
Insert the New Cartridges
Once the old cartridges are removed, you can install the new Epson ink cartridges. But first, remove the yellow tape covering the ink nozzles on the bottom of each new cartridge. This exposes the printhead.
Carefully place each new cartridge into the empty carriage slots, pushing down gently until you hear a “click” indicating it’s installed correctly. Install the cartridges in the proper order, following the arrangement you prepared earlier.
With all four new cartridges installed, close the cartridge cover and printer lid securely.
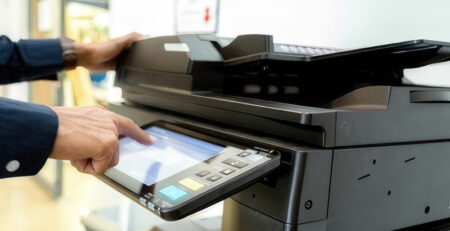
Testing the New Cartridges
The final step is to test your newly installed Epson ink cartridges. Print a test page to ensure proper installation and print quality.
Navigate to the test print option in your printer’s settings menu. The test page should print cleanly with bold, vivid colours and dark blacks. If the test print comes out streaked or spotty, consult your printer’s manual on how to clean and align the print heads.
Now that you understand the basics of changing Epson ink cartridges, let’s look at how the process differs with two other common Epson printer models.
Changing Cartridges in an Epson XP-430
The Epson Expression XP-430 uses both standard and high-yield ink cartridges. Here are the steps to change cartridges in this versatile printer:
- When the “Replace Ink Cartridges” message displays on screen, select “Replace Now.” Or navigate to the Ink Cartridge Replacement menu in Settings.
- Lift the scanner unit to expose the cartridges. The print head moves to the right side.
- Squeeze the tab on each cartridge and pull up to remove. Note the cartridge order.
- Shake new cartridges, remove yellow tape, and insert into slots.
- Lower scanner unit and press Start to begin ink charging.
Changing Cartridges in Epson WorkForce Models
Epson WorkForce printers like the WF-3640 use standard and high-yield ink cartridges. Follow these steps:
- When the replace cartridge message appears, select “Replace Now” or navigate to the Ink Cartridge Replacement menu.
- Lift the scanner unit to reveal cartridges. Open the cartridge cover.
- Squeeze the tab on each cartridge and pull up to remove. Note the cartridge order.
- Shake new cartridges, remove yellow tape, and insert into the correct slots.
- Close cartridge cover, lower scanner unit. Printer will begin ink charging.
Replacing Ink Cartridges is Easy with the Right Guidance
Changing ink cartridges in your Epson printer ensures optimal print quality and performance. While the process varies across printer models, the overall steps are straightforward. Arrange cartridges, remove old ones, install new ones in the correct order, and test print. You’ll be printing high-quality pages again in no time
Shop our wide selection of competitively priced Epson ink cartridges and keep your printer running at its best.